
RAINBOW SORTING COLOR SENSORY BAG
RAINBOW SORT COLOR SENSORY BAG
You know how much I love a good sensory bag (no mess, easy to make, blah blah you know!) Now combine a rainbow AND an oil sensory bag and you can picture me jumping with excitement. Plus, it has been a little while since this bag lady came out to play so she’s back with more fun activities, starting with this color sorting sensory bag.
I was tempted to leave the audio on this video because towards the end, these where Nicky’s statements: “I’m going to win for sure,” “I can do anything” and “I won this whole thing!” So apart from the fine motor skill practice and color sorting, this activity boosts self esteem!
MATERIALS:
Gallon sized freezer zip lock bags
Markers (You can also use permanent markers or food coloring)
Baby Oil (Hair gel or shaving cream can work in a pinch)
Tape (duct tape, masking tape, etc.)
INSTRUCTIONS:
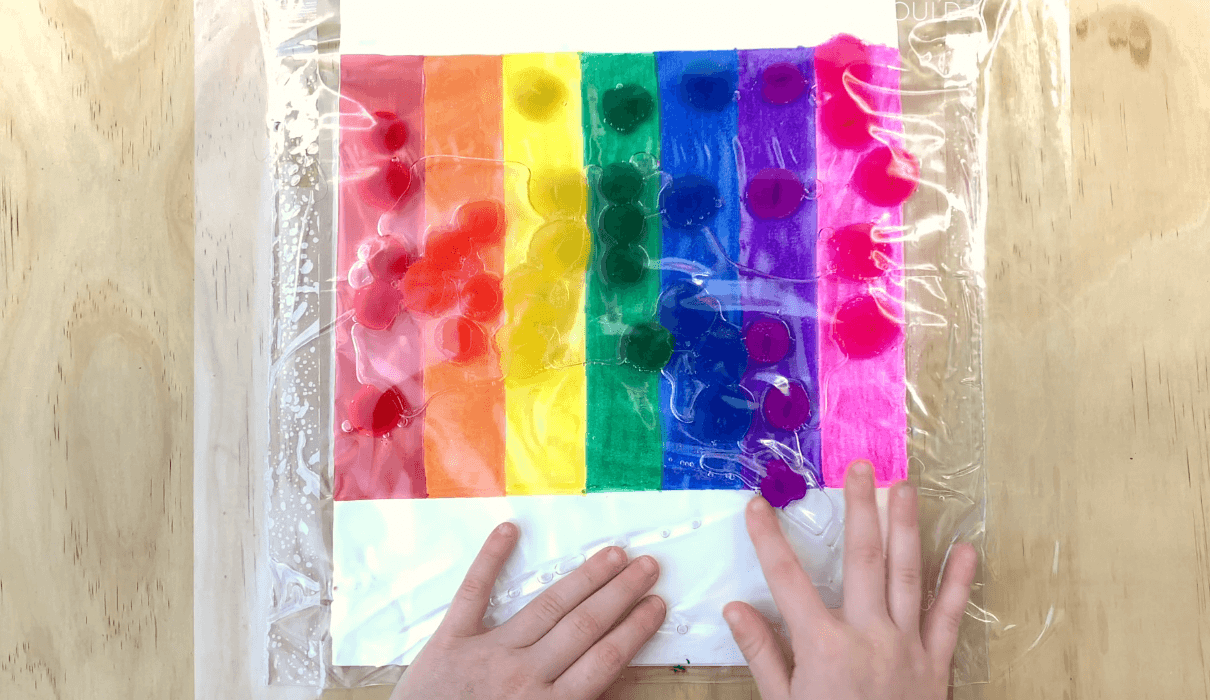
Draw a rainbow on a piece of paper, leaving some white space either above or below. I chose to do rainbow colors in a linear pattern, but the traditional arch will work as well. You can also do colored circles if you want to take a more straightforward approach to learning colors.
Cut the paper to the size of the large Ziploc bag. Tape it to the bag, rainbow side down.
Add about a cup of baby oil to the bag.
Add pom poms and seal the bag shut leaving little to no air inside.
Tape it down to your surface
Push the pom poms to the white space and have your little ones sort them into the matching color.
Tip: To remove all air inside the bag, carefully insert the bag into a bowl of water avoiding the top. Water will help all the air come up and you can seal shut.
Also, you can keep and store this sensory play activity and reuse a few times for longer life span!