
HOW TO MAKE A CROWN FROM PAPER: EASY DIY FOR CREATIVE PLAY
When we think of sensory play, we often picture sensory bins and hands-on activities—but it also includes imaginative adventures! In fact, imaginary play builds directly on sensory experiences, which makes total sense when you consider how immersive a child’s imagination can be. The simplest materials can inspire a colorful world of storytelling, open-ended play, and creative problem-solving.
One of my favorite ways to foster this experience? By making paper crowns! They aren’t just adorable accessories—they’re a fun, hands-on way to support the relationship between art and child development. And best of all, there’s no “right” or “wrong” way to craft. Each crown can become a small reflection of your little one’s imagination, making it all the more meaningful.
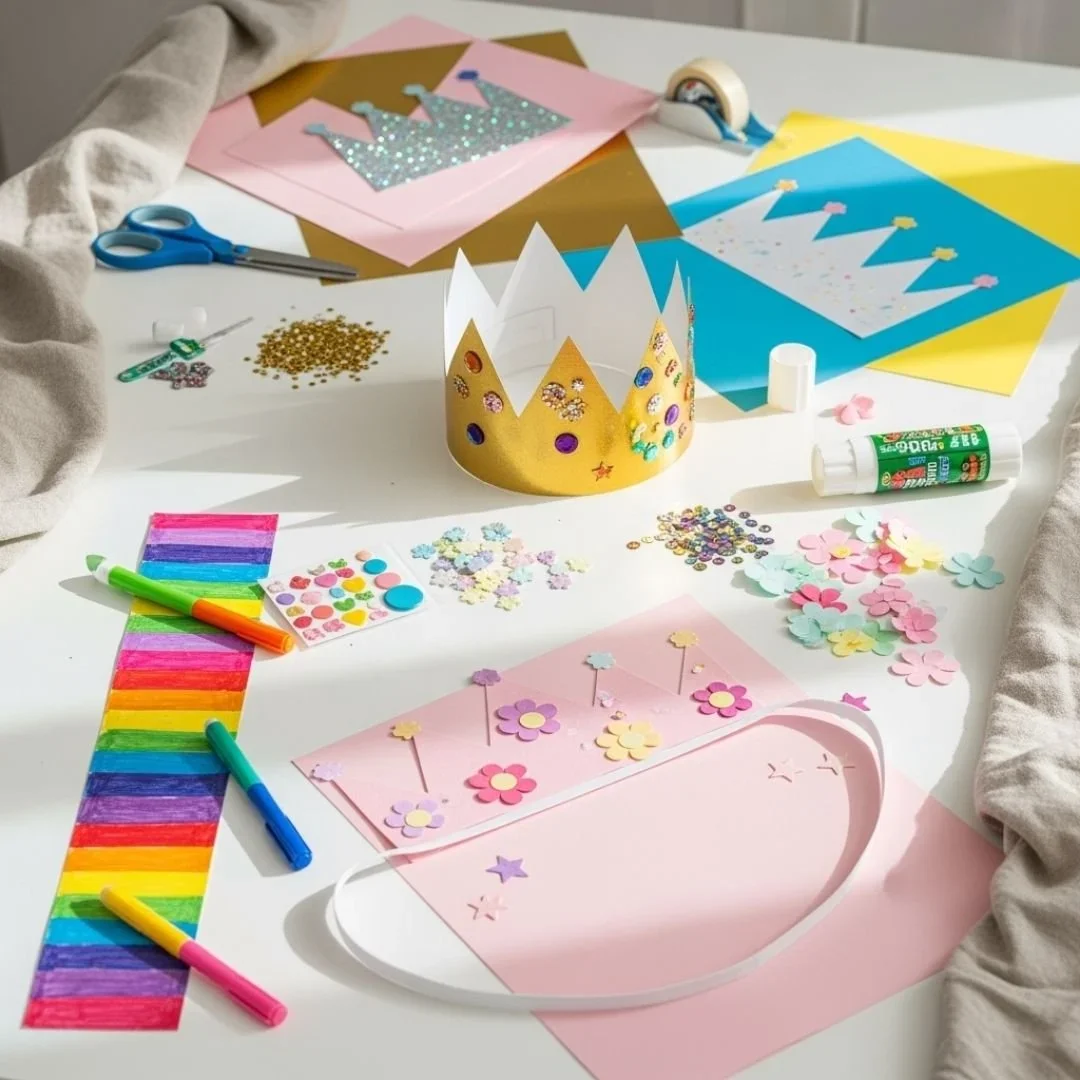
Today, I’m excited to share a simple guide for making your own paper crowns at home. Whether it’s for birthday party favors or a simple rainy afternoon activity, this craft is a fantastic way to spark creativity and bring a little magic to your kiddo’s day. Plus, it’s easy to put together, budget-friendly, and sure to keep little minds happily engaged. Let’s start crafting!
How to Make a Crown from Paper: Easy DIY for Creative Play
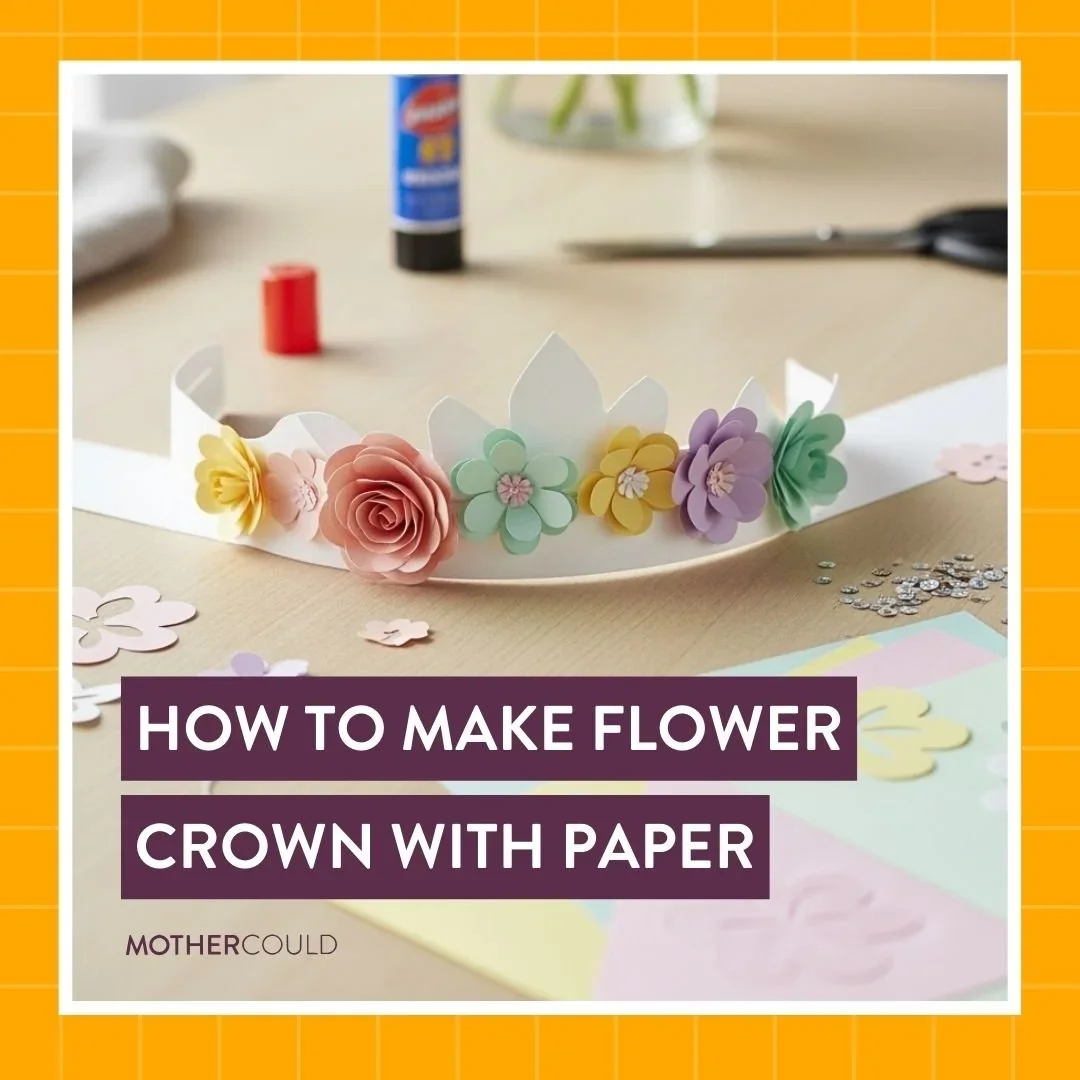
How to Make Flower Crown with Paper
Step 1: Cut out your crown base. Use a strip of cardstock or construction paper long enough to wrap around your child’s head. I recommend using green so it resembles a “stem.” Then, either staple or tape the ends to the proper size.
Step 2: Prepare your paper flowers. Grab a few different colors of construction paper—which ones you choose is entirely up to preference! Cut the paper into strips—about an inch and a half to two inches wide. Fold the paper in half twice, and then cut along the indentations. You should now have four small squares.
Step 3: Create the paper flowers: Grab your first square and fold it hotdog style. Don’t unfold just yet! Now, fold it hamburger style. You should have a smaller square. Cut along the edges to form a teardrop shape. Unfold to create the flower!
Step 4 (Optional): Make the center of the flower. If you want, cut out small circles to glue onto each flower. This will form the “bud.”
Step 5: Cut out leaves. Using green paper, draw small leaves and cut them along the traced lines.
Step 6: Glue it all together. Now that you have everything, begin gluing! Like I mentioned earlier, there’s no right or wrong way to do this. Paste everything where you like it most and hand it off to your kiddos!
How to Make Birthday Crown with Paper
Step 1: Choose your paper. Pick something bright and festive to go along with the theme! If you’re not making this craft as a surprise, have your kid help out by picking their favorite color.
Step 2: Cut and shape the crown. Cut a strip of the paper, making sure it’s about 3 inches wide and long enough to wrap around your kid’s head.
Step 3: Decorate the hat. Before you staple the ends together, write your child’s name on the front. You can also add ribbons, glitter, sequins, or stickers around the base for a little extra excitement!
Step 4: Create your candles. Using a different colored sheet of paper, draw and cut out simple birthday candles. And don’t forget to add the little “flame” at the top! Make as many as you like—enough to wrap around the crown or just enough to match your child’s age. Then, glue each paper candle wherever you think they look best.
Step 5: Complete the crown: Once you’re happy with your paper birthday crown, staple the ends together!
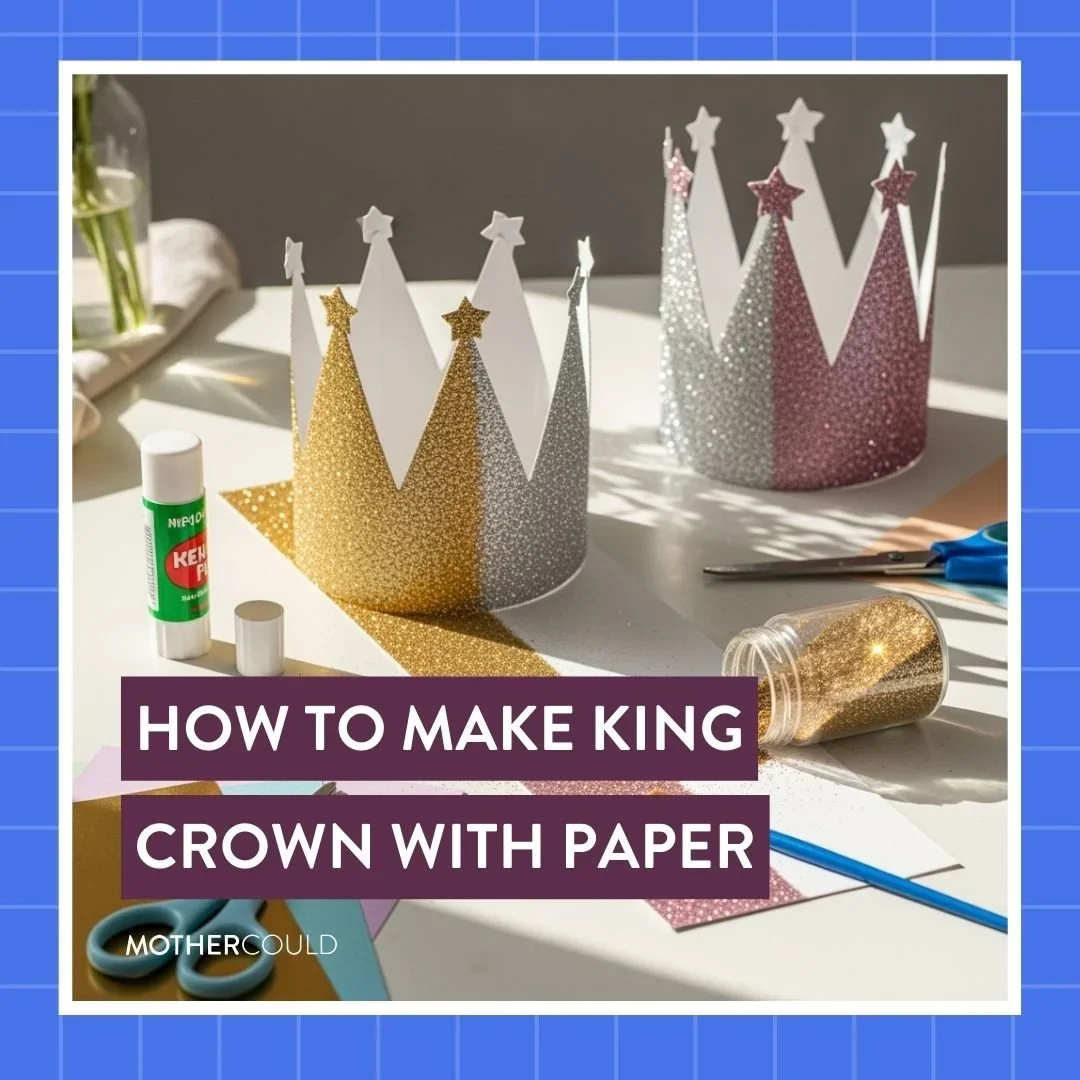
How to Make King Crown with Paper
Step 1: Cut out a gold base. Use gold cardstock or yellow construction paper to create a long strip. Same as before, you’ll want to keep this strip three inches wide and long enough to wrap around the child’s head.
Step 2: Add the bold points. Now, cut out tall points to glue onto the base. I recommend sticking to about 5 or 6, but feel free to add as many as you’d like. Then, cut a small strip (maybe an inch wide) to wrap around the base. This creates a nice, cohesive look, hiding where you pasted things together.
Step 3: Decorate your crown with gems. Glue sequins onto the crown. They can be different colors, shapes, and sizes—don’t be afraid to get creative here! Also, don’t forget to add a bit of gold glitter or use metallic markers to add that “royal detailing” effect.
Step 4: Assemble the crown. Once you’re happy with how everything looks, wrap it into a circle and staple it together.
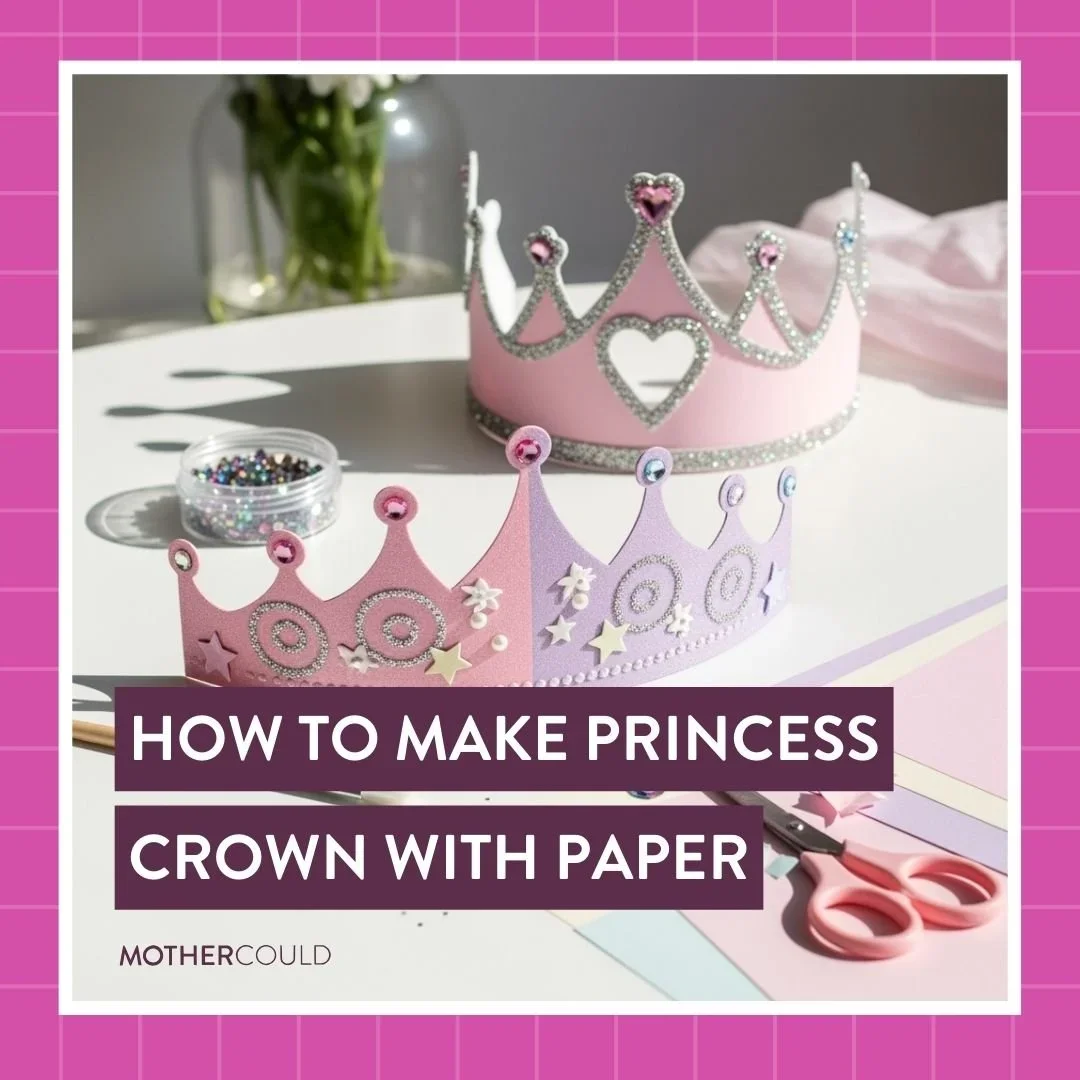
How to Make Princess Crown with Paper
Step 1: Cut out the crown shape. One of the fun things about paper princess crowns is how unique you can make them! Today, though, we’ll keep it simple to avoid any confusion. Using your kid’s favorite color, cut out the base of the crown. Make sure it’s 3 inches wide and long enough to fit comfortably!
Step 2: Create the front of the crown. Using the same color, trace that classic crown shape—flat along the bottom with three points at the top. The middle should be the tallest, with two slightly shorter ones on each side. Once you’re happy with the shape, glue or tape it to the front of your base strip.
Step 3: Add a little sparkle. Trace the outline of the crown with a thin layer of glue. Then, sprinkle glitter on top! Once you have your glitter outline, glue on rhinestones and sequins.
Step 4 (Optional): Glue small pearls to each point. For a fun twist, glue a small pearl to the tip of each point on the crown. Trust me, although it’s a small detail, your little one will love it.
Step 5: Form the crown. Once you’re satisfied with how the crown looks, staple the ends together, and voila!
Want to continue on with the themed fun? Make sure to check out my Princess Activity Pack! It features 12 pages filled with engaging arts and crafts, as well as a DIY crown that children can color and cut out themselves.
Paper crowns are the perfect way to enhance playtime!
Imaginative play is fantastic for child development, which is why I encourage it as much as I can. And with simple DIY crafts like this one, kids get the chance to explore their creativity while also building important skills. Best of all, it doesn’t take much to make this activity, or to make children happy. With a few materials, a little bit of inspiration, and a lot of excitement, paper crowns can spark hours of fun!
If you want more fresh ideas to transform your home into one full of creativity and connection, order our new book, Playful by Design! It’s a practical, easy-to-follow guide packed with tips to enhance playtime and support your child’s development.
For exciting sensory activities and more creative DIYs, check out the Mothercould blog! You can also find kid-friendly meals, step-by-step guides, and creative ideas that can inspire your own playtime routine. Also, don’t forget to join Mothercould In Your Pocket! Allow this to be your handy resource full of hacks, helpful tips, and sensory activity ideas you wish you’d known about sooner!