
HOW TO ORGANIZE A PLAYROOM
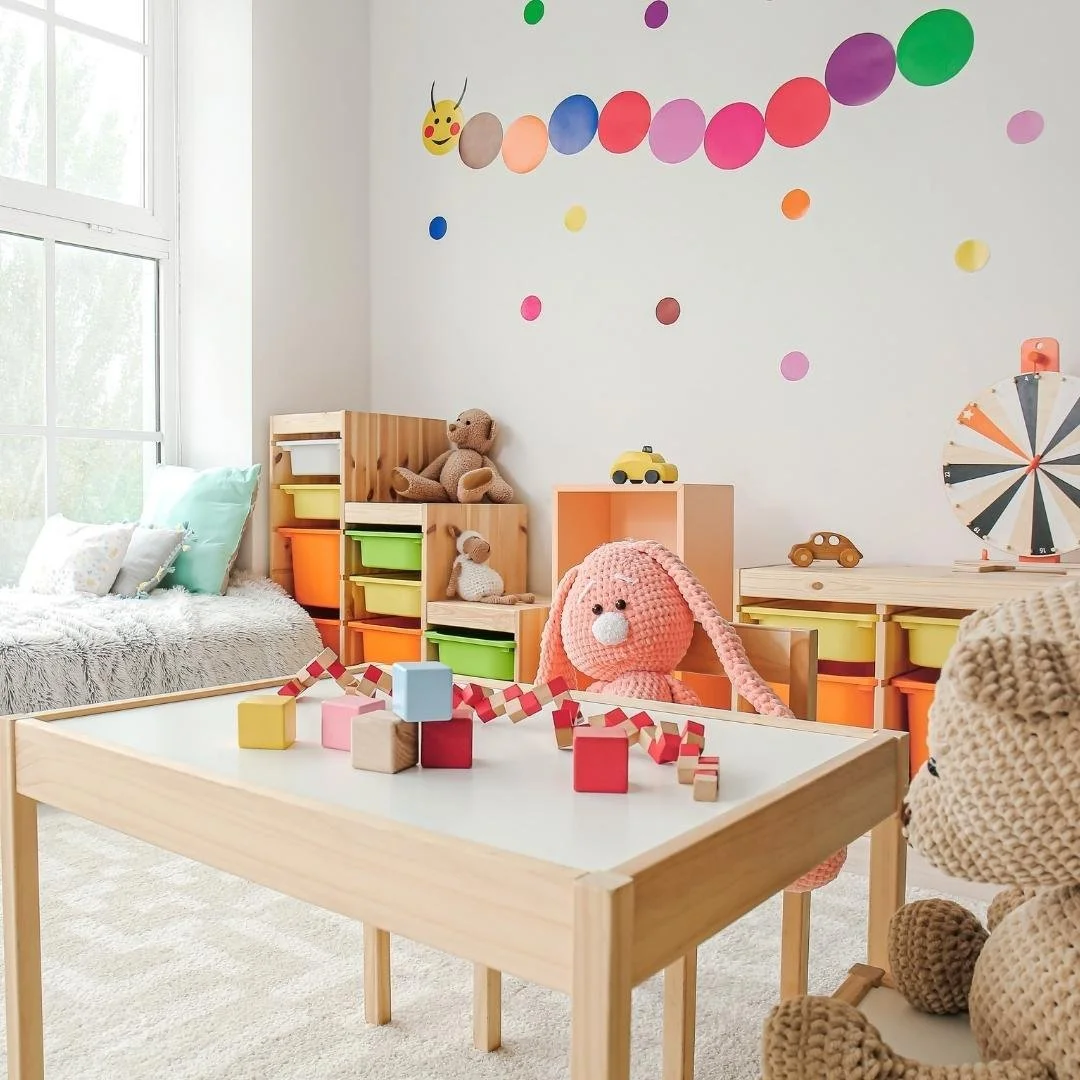
If you’re like many parents out there, you feel you’re drowning in toys–yet your kids barely play with any of them. Believe me, I’ve been right where you are and that’s why I’ve started a new Youtube series on this very topic. You can watch the first episode right here:
Often, your kids aren’t avoiding or rejecting their toys, their play area just doesn’t spark inspiration! This could be for a lot of reasons, the main ones being clutter and disorganization. When the playroom is messy and difficult to navigate, it’s hard for kids to visualize play opportunities. On the other hand, a functional, visual playroom is key to encouraging independence with your children as they play.
But, as you probably already know, creating this open, accessible, and functional playroom isn’t always easy. That’s why, today, I’m sharing my top hacks with you that help families not only get organized but stay organized! Let’s get started!

HOW TO ORGANIZE A PLAYROOM
Step 1: Evaluate your space.
First, you need to evaluate your space. Don’t just look at how much room you have, because a large playroom does not always mean a functional playroom. It’s all about how you set it up!
Identify the biggest problems with your space, like too little wall space or floor space. Examine the current furniture you have and ask yourself if it allows for organization and exploration. And, of course, look at all your stuff and decide if it’s all staying or if you have items you could donate.
Once you’ve taken a good hard look at your playroom, you can begin to formulate your plan and get to work!
Step 2: Define your categories.
To begin the actual organization process, grab a pad of sticky notes and make a label for every category. Start by looking through your toys and jot down what you see: cars, art supplies, blocks, books, etc.
Then, go to another nearby room and place the sticky notes all around the floor. These are now your organizing zones and believe it or not, these zones will make the process of revamping your playroom a lot less overwhelming.
Step 3: Take EVERYTHING out.
Once you’ve created zones, it’s time to take everything out of the playroom!
I know… this seems like a huge undertaking that will make another room just as messy, but trust the process. With organizing, a lot of times, things get worse before they get better!
As you take your kid’s toys out of the playroom, place the items in their designated organizing zones. If there’s something that doesn’t belong in any category, grab a sticky note and make another group for that new type of toy. And, again, consider what could be given away.
Make a donation zone and place all the toys in there that you think could go to another family. However, before donating, go through the toys with your children to make sure they’re okay with the decision. Once everything is out, you’ll have a crisp clean slate to work in. This will be much more pleasant and productive than trying to work amid the chaos!
Step 4: Separate your room into quadrants.
Next comes another planning phase. Separate the playroom mentally into quadrants and determine what will be in each one. For example, your four quadrants could include a space for arts and crafts, a space for pretend play like dress-up or construction, a space for a reading nook, and a space for various sensory play items!
Then, consider what toys, but also what storage solutions, would make the most sense in your space. The type of furniture you use is the foundation of a functional play space. Everything should be easy to access and provide simple organization opportunities. Think about things like open shelving, shallow drawers, height, and storage potential.
And remember, furniture needs floor space. So, if there isn't enough for all of your furniture and adequate play space, consider going with vertical storage, which is a great hack for small spaces.
Bonus tip: Don’t be afraid to reuse old furniture. There are a lot of ways to upcycle existing furniture, so you don’t have an expensive trip to Ikea or Amazon shopping haul if it’s not in the budget!

Step 5: Purchase the right furniture & install it.
Now that you know what furniture you need, purchase or repurpose your furniture and set it all up. While assembling the room, remember what each quadrant is for! When you’re finished, be sure to take a step back and confirm it still looks and feels functional, aesthetic, and orderly.
Bonus Tip: Beyond furniture, think about what unique storage challenges you have (like lots of stuffed animals, train tracks, or Barbie clothes, etc.) You’ll need to organize those things as well!
Step 6: Put everything in its new home.
Now, it’s time to put everything away. Again, this might feel overwhelming, but remember that everything is already separated into categories, so it’s just about putting things in their new home! Clear bins will be your best friend. This will inspire creative play since your children can see all their opportunities to play right when they walk in.
Also, know that less is more when creating these systems. Don’t put too much in any one bin and keep all your categories separate. Mesh storage bags work well for storage within storage if you need to further break up the categories.
And, don’t forget that we’re trying to create the foundation of independent play. Including things like an art corner, a book wall, a sensory space, and more can be the perfect ways to store toys and activities in a way that’s visually appealing, but not hidden where your child can’t engage with it.
Step 7: Consider the toys’ accessibility to the right kids.
Before you finish, get on your child’s level and explore. Determine if the systems you’ve set up make sense based on your child’s height, taste, and preferences!
For example, a crawling baby should have all their toys on the bottom shelf, so they are accessible. An older elementary-aged child should have all their stuff on the top shelf or wall.
The point is, that most of their toys should be stored at their eye level.
Step 8: Add labels to every bin and bag.
Once you’ve confirmed your organization system makes sense, label EVERYTHING. This way, with one glance, you can easily determine what’s in a bag or box without having to dig through or investigate. This makes toy rotations and toy retrieval way easier. The clarity of what’s in the container will also make clean-up easier for you and your child! Best of all, it’s easily accessible to make playing a breeze.
Step 9: Consider a toy rotation.
If you’re running out of storage space in the playroom or dealing with toy clutter, consider other storage options. You could implement a toy rotation where some toys at first get put away and some stay out—but then you switch out the items a few weeks/months down the road. It’s great for keeping your child stimulated.
Every time you get out another bin of toys, your children will feel like it’s Christmas. The toys will feel new and exciting, which further promotes independent play. A toy rotation is also a good idea if your child’s favorite toys have gotten out of control. In episode one of The Messy Playroom Makeover, my client’s son had a ton of Hot Wheels cars. So, we organized some, displayed some, and stored some away to rotate back in later!
Step 10: Enjoy Your Kiddos New Space!
Finally, let the kids in! Watch them engage with their toys in a whole new way, and help them understand the organizational systems you have in place, so they can help keep things tidy too! If something doesn’t work as you hoped, adapt and adjust until you get the right system and process.
Parents - you’ve got this! In need of some organizational inspiration? Let’s dive into some of my favorite organization ideas below!

19 Playroom Organization Ideas
4 Tier Stackable Storage Baskets
These stacking tier baskets are the perfect storage solution for things like balls and stuffed animals that don’t sit on shelves well and are too big for most shelf baskets.
This product is four wire baskets stacked on top of each other with casters on the bottom, which means your kids can roll the cart right to the action. You can get it in black or white depending on your final playroom aesthetic.
Acrylic Floating Bookshelves
These acrylic floating bookshelves are a great hack for encouraging independent play! Instead of just having the books on a shelf where your kids won’t really see them when they walk by, display them on a floating shelf with the cover displayed. Now, they’ll engage with the books on their own!
KidKraft Wooden Play Kitchen
I love using this white and silver KidKraft kitchen in my playroom remodels because it’s easy to coordinate the other furniture in the room to match. Plus, it has plenty of storage for your child’s play food and utensils!
Three-Tier Wall File Holder
Remember, vertical storage is your friend. These wire file holders can be used for art supplies, books, or even Hot Wheels tracks! Don’t be afraid to get creative with your playroom storage ideas!
3-Tier Rolling Utility Cart
These rolling utility carts are useful in any room of the house, but especially in the playroom. In my most recent playroom redo, I used a cart like this for art supplies.
To make them more functional, add utility cart attachments like these hanging cups and hooks.
Art Table and Chair Set
It can be intimidating to keep art supplies out for your child to access, but having open-ended materials ready for your child to play with is fantastic for creative independent play! An art table like this with extra storage inside is the perfect addition to any playroom. For tips on organizing toy clutter, tools and art supplies inside, check out my DIY cardboard drawer organizer.
Rotating Acrylic Pen Holder
I love acrylic organizers because they allow your child to see everything inside with ease! This is ideal for solo playtime and fast pickup time. These rotating pen holders are useful for the art desk or a homework table!
Phomemo Label Maker Machine
As I mentioned earlier, labels ensure you can discern what’s in a bin or bag instantly, making maintaining your new organizational system much easier. A label maker is a must for a playroom organization project!
Cube Organizer Shelf
Cube organizers are one of the most versatile pieces of furniture you could add to your playroom. You can add bins, use them as bookshelves, or even transform them into a dollhouse. If you use baskets, I recommend ones with an acrylic window for easy viewing!
Zipper Pouch
Zipper pouches are useful for a variety of things in a playroom. If you’re putting some items in storage, labeled zipper pouches within large totes are a great hack for stowing away a lot of smaller toys in an organized way! I also like to use them for card games and board games to keep all the pieces together.
You could even use the label maker to attach a list of contents for each game to the pouch. When you do this, you make sure all the pieces end up back in the bag at the end of the day! Try zipper pouches to organize Lego sets, doll clothes, and other small toys too.
Large Reversible Playmat
Hardwood is the best for easy cleaning, but not as nice for playing. A waterproof foam mat provides the perfect place for hours of independent play!
UTEX Kids Table and Chairs
You could use the art table listed earlier as a standard table and chairs, but this is another option for playroom seating! This table is useful for everything from snack time to slime time. (Here are some benefits of playing with slime, if you’re skeptical!)
Rectangle Storage Basket
Clear and plain toy storage baskets have their place, but if you want something a little more aesthetic or styled, these baskets work well.
Wall Mounted Coat Rack
Hooks are perfect for pretend play. They can hold dress-up costumes, toy cleaning tools, hanging baskets, and more.
Stackable Storage Drawers
These storage bins stack on top of each other and come in a variety of sizes. If rolling carts aren’t your thing, these would work well for art supplies too! Really, these clear drawers can be used anywhere in the house for easy organizing!
Stuffed Animal Hammock
Do all kids have an army of stuffed animals or just mine? This hammock hangs in the corner of a room and the netting hangs slack to hold a ton of stuffed animals!
Compartment Container
Doll and action figure accessories. Lego special pieces. Mini figures. All of these things are tough to store in a way that’s visual, organized, and simple. These compartment containers are a great hack for keeping all the little pieces together and categorized.
Grocery Bag Holder
In my latest playroom makeover, I mentioned that my client’s son had a lot of Hot Wheels. He had a lot of cars, but he also had a ton of tracks! I used grocery bag holders like this to keep all of it organized and accessible!
Sensory Table
Sensory play is our favorite thing at Mothercould. There are so many benefits to sensory play and it keeps kids entertained for hours! Though sensory play is beneficial and fun, it can be a little messy. A table like this gives you a place to facilitate all of your favorite Mothercould sensory activities. For a full catalog of sensory play ideas, download the Mothercould in Your Pocket resource!
Organizing Tips For Children's Rooms
Children’s bedrooms serve SO many purposes. They’re a place to sleep, read, relax, and play, which means organization needs to support several different activities at once. One helpful thing I put in place is to create clear “zones” within the room. For example, keep books near the bed for reading, toys near the floor for play, and clothing storage close to the closet. Separating these areas helps children naturally understand where things belong.
Another helpful tip is simplifying the number of storage containers you use. Too many boxes or baskets can make a room feel just as cluttered as the toys themselves. Instead, focus on a few larger storage areas so cleanup stays quick and manageable. It’s also helpful to schedule occasional reset days. Every few months, take time to tidy shelves, sort through items your child has outgrown, and return misplaced toys to their proper rooms. These quick resets keep small messes from turning into major clutter!
How To Organize Soft Toys
Soft toys can pile up super quick, so it helps to limit how many stay in the playroom at one time. To do this, just choose a small group your child currently enjoys and store the rest elsewhere. Rotating them occasionally keeps the collection manageable while still letting your child enjoy different toys over time. You can also group plush toys by size so smaller ones don’t get lost under bigger ones.
How To Organize Toy Cars
Toy cars are WAY easier to manage when they’re sorted into simple categories like race cars, trucks, or character vehicles. You can also keep a small number available for daily play and store the rest separately, swapping them out occasionally. Swapping them occasionally keeps the play area from becoming overwhelmed with tiny cars. Keeping cars stored near racetrack pieces can also make setup super easy during playtime.
How To Organize Stuffed Toys
Stuffed toys have a way of multiplying suuuuuper quickly, so the key is keeping them contained and easy to manage without taking over the whole space. Try using one or two open baskets for everyday favourites so your child can easily grab and put them away, and rotate the rest out of sight to reduce clutter and keep things feeling fresh. You can also make use of vertical space, like a corner hammock or wall basket, to free up the floor while still keeping toys visible. Keeping a small, dedicated “plushie zone” helps create boundaries, making the playroom feel calmer and more organized without needing a complicated system.
Playroom Ideas for Small Rooms
When you’re designing a playroom in a smaller space, the goal isn’t to fit in as much furniture as possible, trust me. Instead, you really want to try and protect as much open play space as you can. Kids do their best playing when they have room to spread out and move around.
It can also help to choose one main focus for the room rather than trying to squeeze in every type of toy or activity. Maybe the space is mainly for building toys, reading, or creative play. When the room has a clear purpose, it naturally feels calmer and less crowded for you little one.
Furniture placement makes a big difference, too. If possible, keep the center of the room open so kids have space to sit, build, and play comfortably on the floor.
And if the room still feels a little tight, a few small design choices can make it feel bigger. Light colors, simple wall décor, and smaller furniture pieces can help the space feel brighter and more open, while still being a fun place for your kids to play.
Organizing your playroom takes a little planning and the right tools!
You don’t need a big remodel budget or a hoarding specialist to get your playroom in order. This step-by-step guide and recommended product list should give you all the tools you need to make playtime fun for the kids and stress-free for you!
If you want more playroom organizing tips, tune in to my YouTube series, “The Messy Playroom Makeover.” You’ll find lots of great practical tips there, too!
Let’s take back your space and bring the excitement back to playtime with these kid-friendly playroom organisation tips!