
TEACH KIDS TO READ AN ANALOG CLOCK
ANALOG CLOCK DIY
I had been thinking of ways to getting Emma (4 yrs) excited about traditional clocks. We don’t have any in our house so I made one! It is a great activity to teach kids how to read an analog clock.
Since she’s a bit older, I did the first few steps and then let her put the numbers on the clock. It’s easier to remember something when you do the process yourself. She was super into it but mostly into the DIY dry erase box honestly. I couldn’t find my mini dry erase board so this plastic box has to do. And that's the best part of these recycled at home activities, even if you thing you are missing something, theres always something at home you can use as a better alternative!
YOU’LL NEED:
Recycled paper plate
Dry erase board or recycled plastic box
INSTRUCTIONS:
Using a ruler, make a dot on the 4 quadrants of the back of the plate. This will help indicate where the numbers go.
Number the dot stickers from 1-12
Add the dot stickers around the circumference of the plate.
Make a little whole in the center of the plate.
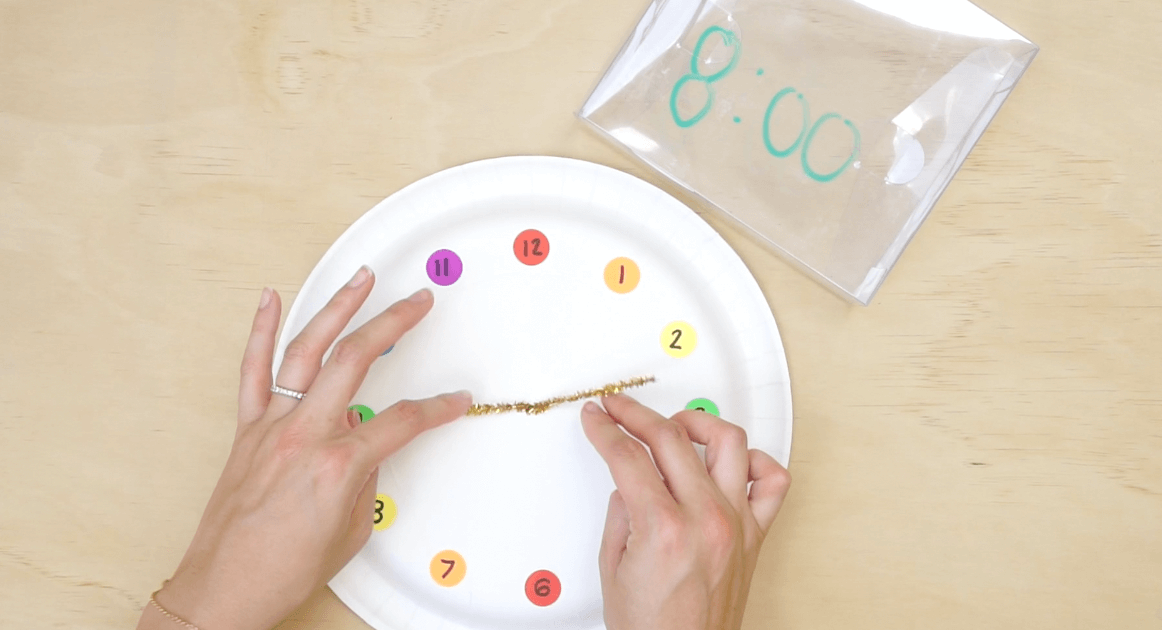
Bend the pie cleaner so that one end is longer than the other. Pull it through the center about half way and twist it in place.
Write a time on the dry erase board and have your child find the time
Tip: Add a second row of dot stickers with the equivalent time reference for each number.