
8 CLAY CRAFT IDEAS: FUN AND EASY PROJECTS FOR KIDS AT HOME
Crafting with kids is more than a fun way to spend the day—it’s a hands-on adventure of creativity and discovery! And as I discussed in “Skills That Arts & Crafts Help Develop” there’s plenty of overlap in benefits, materials, and magical moments.
While browsing the blog recently, though, I realized something. I’ve shared melted crayon crafts, crafts for kids with puffy paint, and even holiday crafts. However, I’m missing one of my favorite materials… Clay!
While it may seem similar to play dough, clay is a little different—texturally, creatively, and in how it holds its shape. More specifically, clay works beautifully for projects that require structure, detail, and long-lasting designs. This is super exciting for kids because they get to create something that lasts. And, as we know, there’s nothing like that sense of pride and accomplishment!
And, don’t worry—you don’t need to be an art connoisseur here—I’ll prove it! Today, I’ll be discussing the different types of clay, fun crafting ideas, and a step-by-step guide for making unique masterpieces. No need for expensive high-quality materials or equipment; all it takes is a little patience and a lot of excitement.

8 Clay Craft Ideas: Fun and Easy Projects for Kids at Home
Alphabet Magnets:
Take a simple alphabet cookie cutter, press it into the clay, and decorate it after it dries. Then just hot-glue tiny magnets to the back and place it on the refrigerator. Easy and fun!
Clay Flower Pot:
Skip the hard part and grab a simple ceramic flower pot. The real fun comes from letting your kids jazz things up with air-dry clay decorations! Let them create whatever they like, and then use it afterwards!
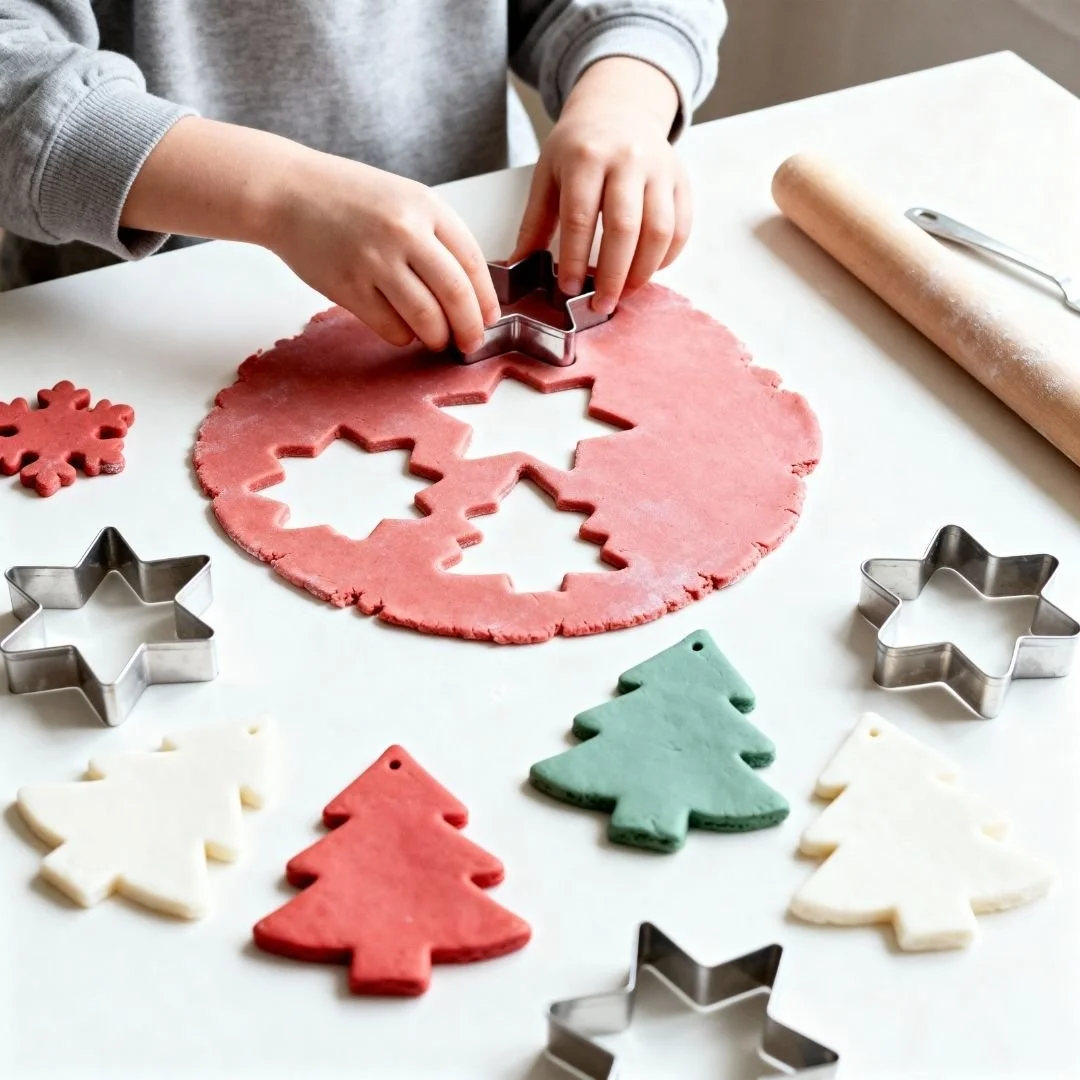
Holiday Ornaments:
Flatten the clay with a rolling pin and use a holiday cookie cutter to create festive shapes. Let it dry, and then kids can add whichever embellishments they want!
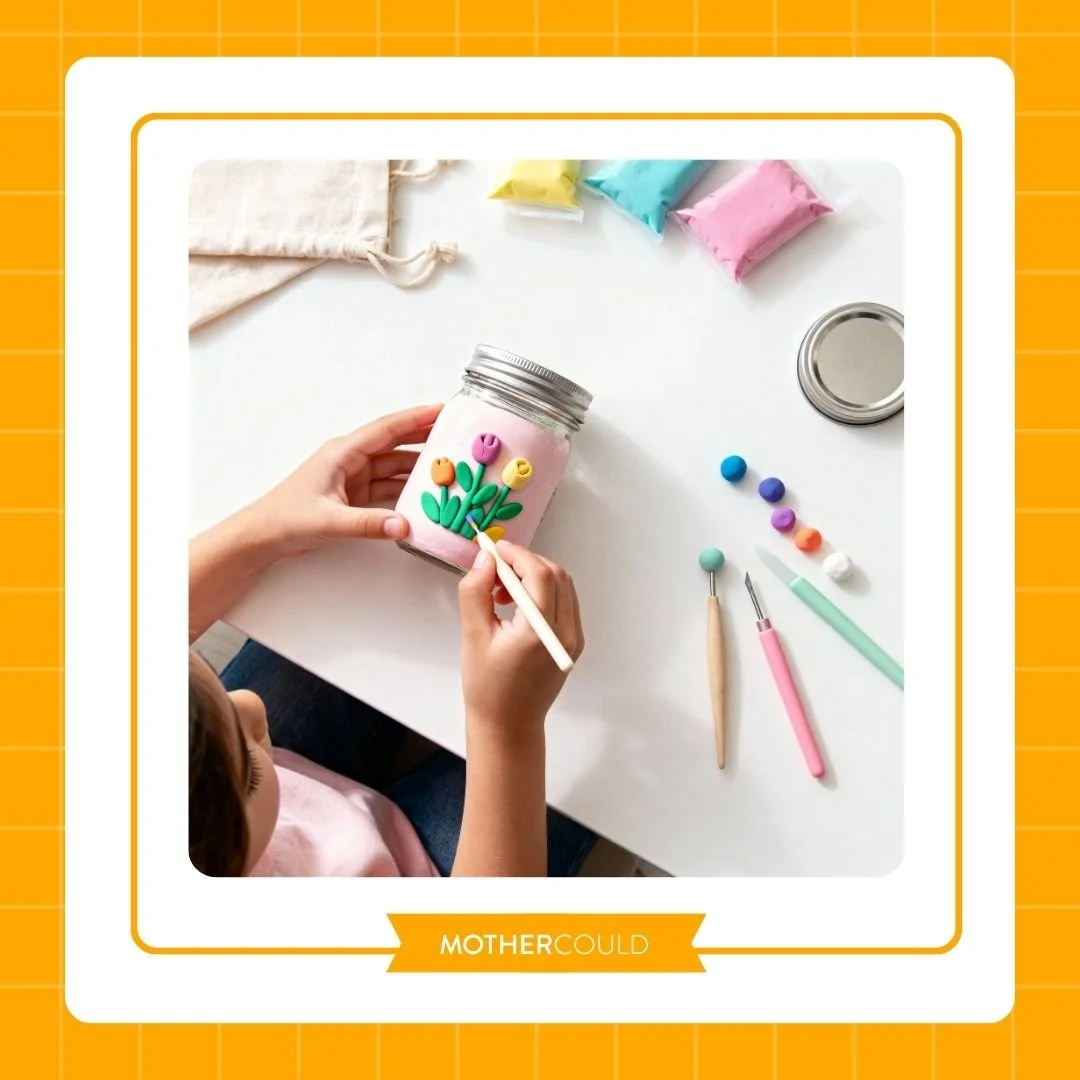
DIY Lanterns:
Have your kid use an old mason jar to cover the entire surface in colorful clay. Then, use a plastic knife or cookie cutter to cut out any shape of their choice. Pop in a tea light and watch the lantern come to life!
Trinket Dish:
Using white clay, roll it and form it into whatever shape your kid wants. Once it dries, they can paint it with fun designs! For extra excitement, surprise them by lining the edges with metallic paint.
Dino Fossils:
Flatten white clay, cut out a few circles, and press in plastic dinosaur figures. Remove them after a few minutes, let the clay dry, and you get fun, DIY fossils!
Colorful Rings:
Flatten the clay, cut out a small strip, and measure it to your kid’s finger. Then, squeeze the two ends together to close it. Let it dry, decorate, and now you have a cute, handmade ring!
Fruit Coaster:
After you flatten the clay, cut out a circle and let it dry. Then, your kiddos can paint different fruits on each! Use them as coasters—or just cute decorations.
Which Clay Is Best for Crafts? An Easy Skill-Level Guide
Ultimately, the best type of clay for crafts depends on what you’re making. Let’s take a look at each option and explore its unique differences.
We’ll start off with air-dry clay. For kiddos, this is generally considered the easiest medium to use. It’s soft, pliable, squishy, and super easy to manipulate. Plus, it doesn’t require any special equipment or expensive accessories. After the kids finish their projects, set them somewhere safe so the clay dries naturally. It only takes about 24-72 hours!
Next up, you have oil-based clay. This is also known as plasticine or modeling clay. It’s a fantastic choice for kids because, essentially, it never dries out! Because of this, little ones can work at their own pace, shaping and reshaping masterpieces as they please. Remember, though: because it doesn’t harden, it’s strictly used for play, creativity, and skill-building.
Now, let’s talk about polymer clay—the medium most commonly used for fun, decorative items. This type of clay, under adult supervision, is completely kid-friendly. It’s non-toxic, easy to work with, durable (once baked), and, excitingly enough, comes in lots of bright colors! However, polymer clay is technically “oil-based.” So, for curing and hardening, you do have to “bake it” in an oven.
Pottery clay is where we get into “let’s take a class for this” territory! It’s firmer, heavier, and requires special tools and techniques—like acrylic paints and kiln firing. It’s fantastic for crafting large sculptures, but it’s not what I could consider “at-home friendly.”
And, finally, you have play dough. Technically, of course, it’s not “clay!” It is, however, a simple, kid-friendly medium that’s perfect if you aren’t entirely sure about using real clay just yet. Make sure to check out my “Homemade Play Dough Recipe” if you decide to take this route!

How to Make Clay Crafts at Home
Step One: Choose the right clay. Depending on your child’s age, pick clay suitable for their unique skill level. Air-dry clays, polymer clay, and oil-based clay are all fantastic options!
Step Two: Think about what you want to create. For littles, clay crafts are more about open-ended exploration rather than an end result. And that’s totally fine—it still falls under the umbrella of “clay crafts” to me!
For older kids, though, create a game plan. Both air-dry and polymer clays can create a wide range of things! However, polymer clay is ideal for more durable, detailed work—like jewelry or figurines. Air-dry clay is perfect for small ornaments or cute little trinket dishes.
Step Three: Prep your workspace. Before crafting, make sure to cover your workspace. Polymer play, depending on the color, can stain. It can also pick UP stains, so be mindful of this during the process!
Step Four: Gather simple tools. With kid-friendly crafts comes kid-friendly tools. Gather things like plastic knives, rolling pins, cookie cutters, and toothpicks before you start. This way, you don’t have to sprint off mid-craft to search for anything!
Step Five: Encourage creativity. Clay may feel a little like play dough, but the textures and colors behave much differently! Encourage your kids to squeeze, squish, and blend, exploring the medium on their own terms.
Step Six: Work in small sections. For younger kids, especially, smaller steps lead to bigger smiles! Sometimes, the slower they work, the easier it is to prevent frustration and mess.
Step Seven: Finish and Decorate. After the play hardens, kids can paint, glaze, or add embellishments. Remind them that it’s their craft—they have total creative expression, here!
Step Eight: Clean up together. Make clean-up part of the fun! Wash tools together and put away leftover clay for next time.
Clay is the perfect kid-friendly material for creating unique, exciting masterpieces!
Crafting is one of my favorite activities to do with my kids. Nothing beats the way their faces light up after making something unique, exciting, and 100% by themselves. (Well, for the most part!) And while there are tons of materials to use, clay is by far one of the best. Not only is it easy to shape and fun to play with, but it’s also perfect for creating long-lasting keepsakes that kids are proud to display.
For even more ways to foster fun, growth, and confidence, don’t miss out on our new book, Playful by Design! Imagine planned play-spaces, decluttered rooms, and toy rotation systems—this stress-free guide helps you create the harmony in your home you’ve always dreamt of. And, best of all, you have the time (and space) to actually catch your breath!
Don’t stop there, though. Head to the Mothercould blog for sensory activities, organization favorites, and kid-friendly recipes—like hidden-veggie muffins! Also, don’t miss out on joining Mothercould In Your Pocket. This is your one-stop shop for 60+ printable recipes, guided tutorials, activity packs, and more!
Also, don’t forget to share your clay craft creations with me over on Instagram! I can’t wait to see what all of you (and your little ones!) come up with.